Android开发——Jetpack Compose的使用
创始人
2024-03-15 18:53:27
0次
Android开发——Jetpack Compose的使用
- 什么是Jetpack Compose
- Jetpack Compose带来的变化
- Jetpack Compose的两种运用方法
- 将Jetpack Compose 添加到现有项目
- 1.gradle 配置
- 2.使用Kotlin-Gradle 插件
- 3. 添加依赖项
- 创建一个新的支持Jetpack Compose的项目
- 1.创建
- 一些简单应用
- 定义可组合函数
- 在 Android Studio 中预览函数
- 使用 Column
什么是Jetpack Compose
Jetpack Compose是一个用于构建原生Android UI的现代工具包。只需要将声明性的函数构件一个简单的界面组件就能完成本该繁琐的UI界面设计。
Jetpack Compose带来的变化
在没有Jetpack时,设计UI界面就像你想要搭建一个城堡,但是城堡的城墙高度、建造材料怎么得到、耗时耗力都需要你自己去算。而有了Jetpack后,设计UI界面就像你有一套完整的乐高积木,你想要搭怎么样的城堡,只要拿积木堆积即可,方便了不知多少。
Jetpack Compose的两种运用方法
- 将Jetpack Compose 添加到现有项目
- 创建一个支持Jetpack Compose的新应用
将Jetpack Compose 添加到现有项目
毫无疑问,如果你想要将Jetpack Compose运用到现有的项目,你需要在原有的配置和依赖中添加一些修改:
1.gradle 配置
在build.gradle将最低的API版本设置在api21以上,并且开启Jetpack Compose的运用开关
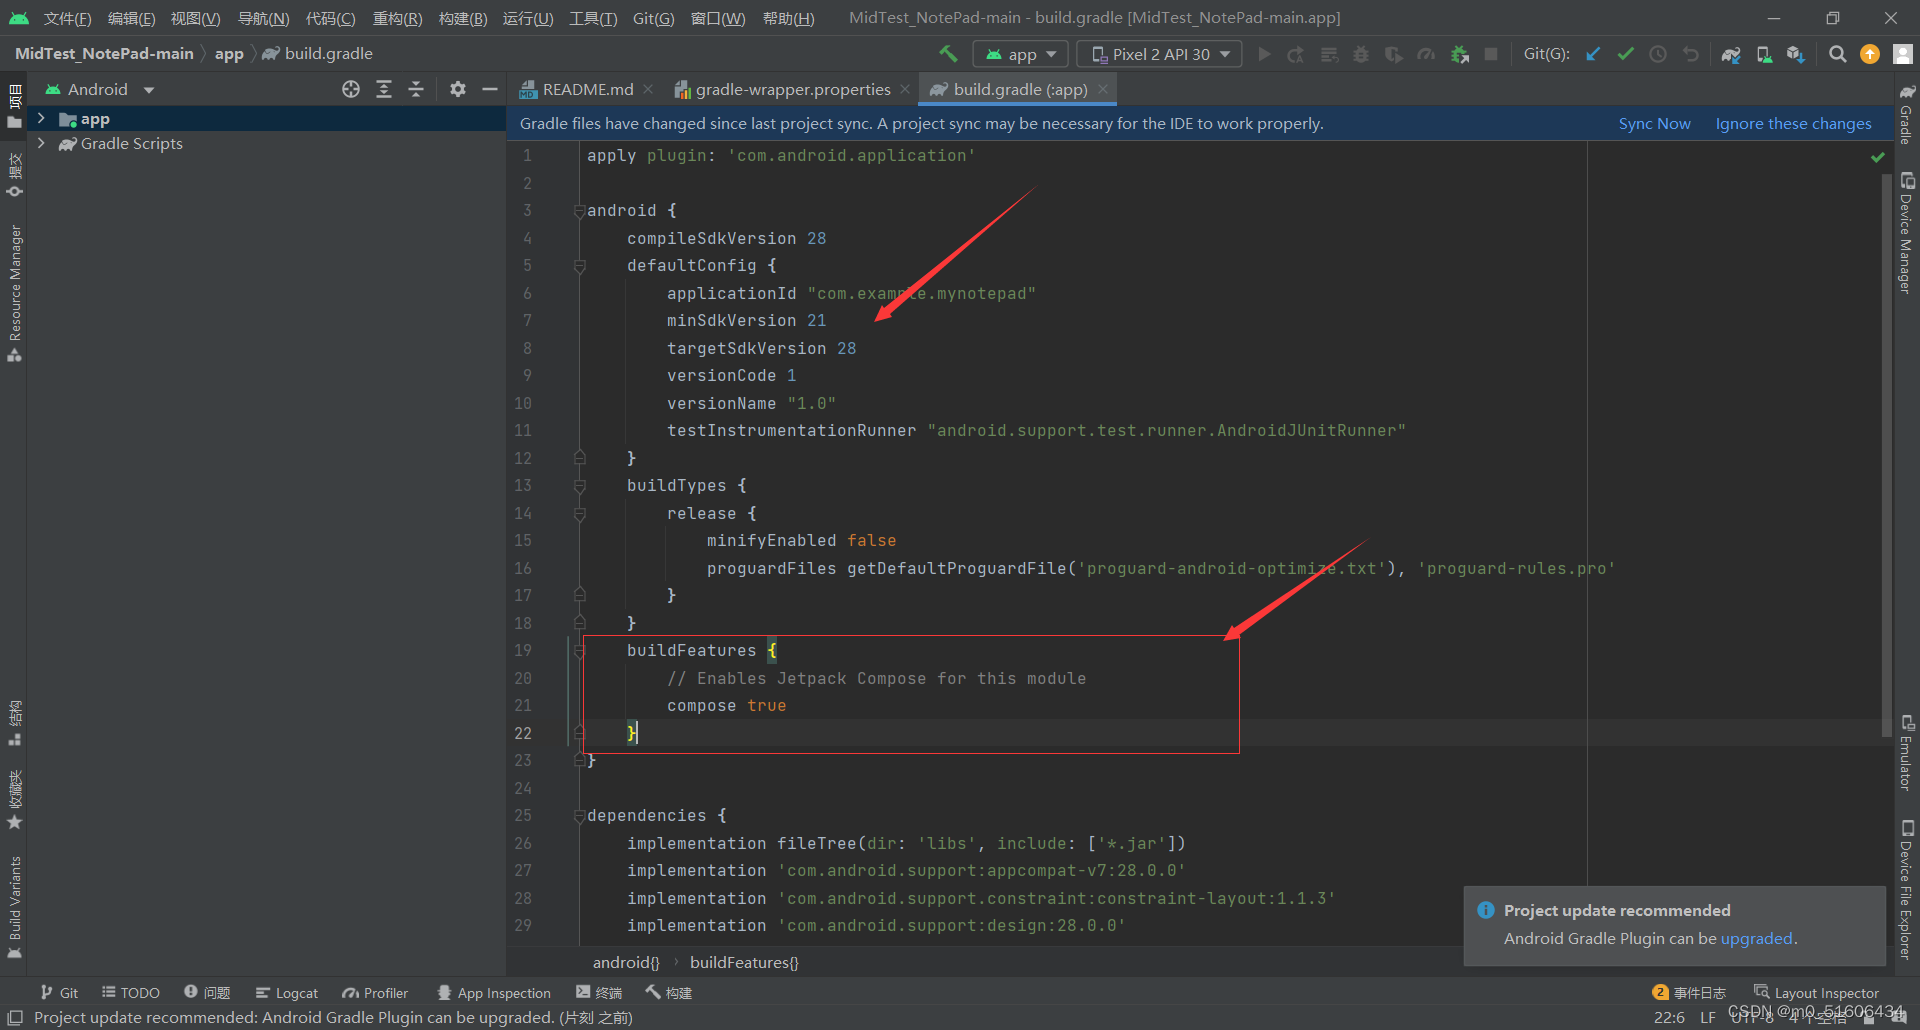
buildFeatures {// Enables Jetpack Compose for this modulecompose true}
2.使用Kotlin-Gradle 插件
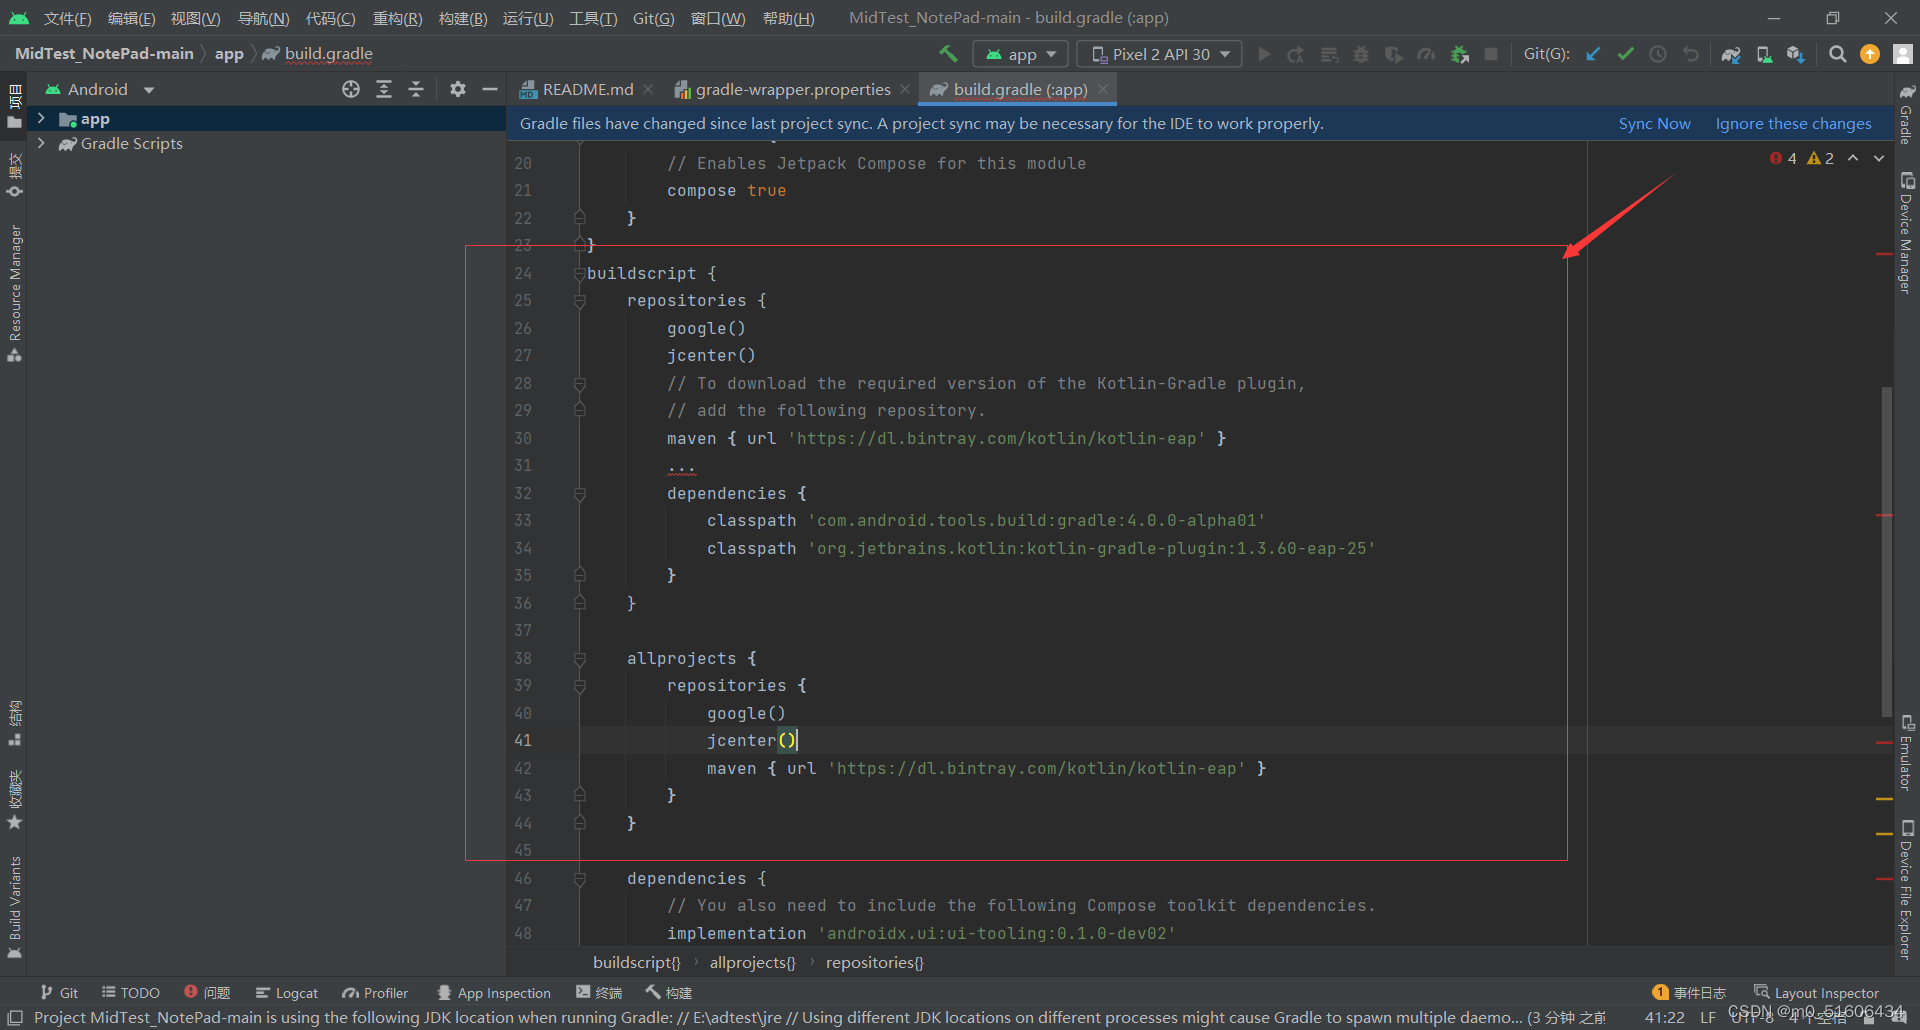
buildscript {repositories {google()jcenter()// To download the required version of the Kotlin-Gradle plugin,// add the following repository.maven { url 'https://dl.bintray.com/kotlin/kotlin-eap' }...dependencies {classpath 'com.android.tools.build:gradle:4.0.0-alpha01'classpath 'org.jetbrains.kotlin:kotlin-gradle-plugin:1.3.60-eap-25'}
}allprojects {repositories {google()jcenter()maven { url 'https://dl.bintray.com/kotlin/kotlin-eap' }}
}
3. 添加依赖项
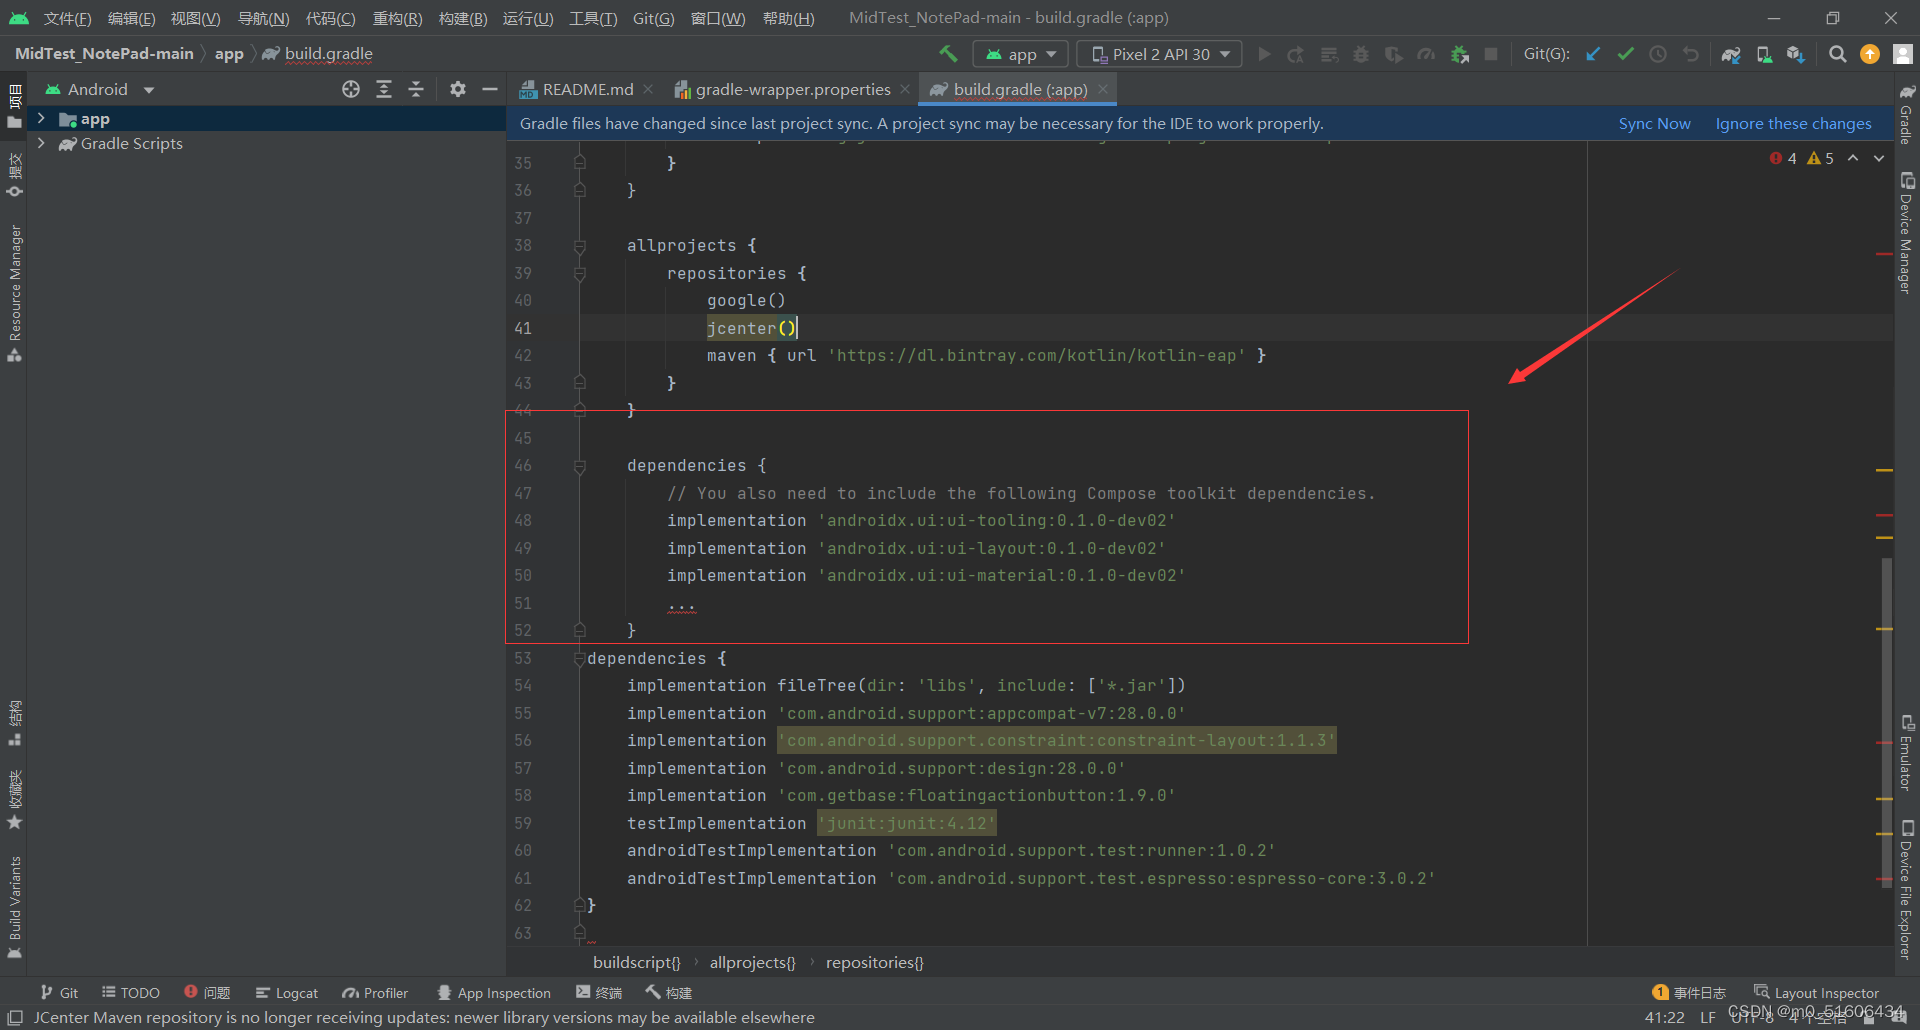
dependencies {// You also need to include the following Compose toolkit dependencies.implementation 'androidx.ui:ui-tooling:0.1.0-dev02'implementation 'androidx.ui:ui-layout:0.1.0-dev02'implementation 'androidx.ui:ui-material:0.1.0-dev02'...
}
现在你就可以开始你的工作啦
创建一个新的支持Jetpack Compose的项目
1.创建
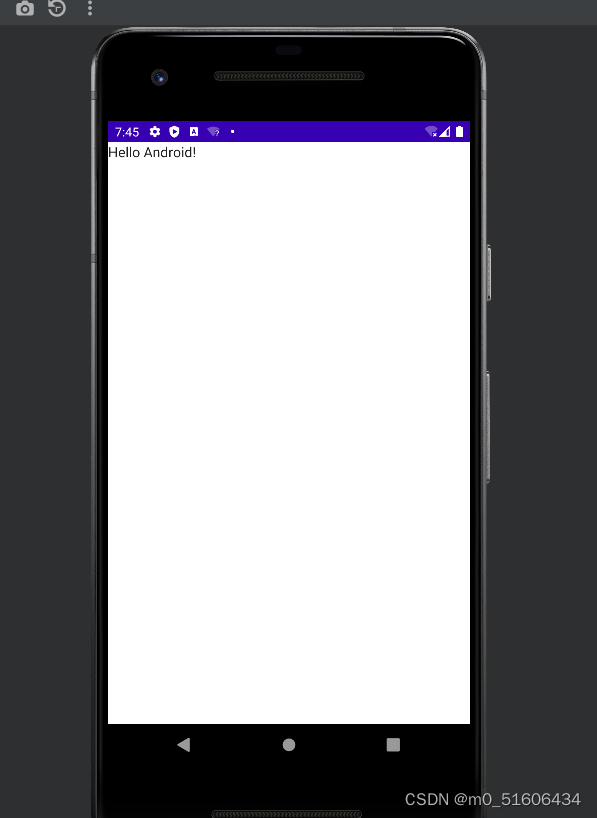
在创建新项目时选择Empty Compose Activity
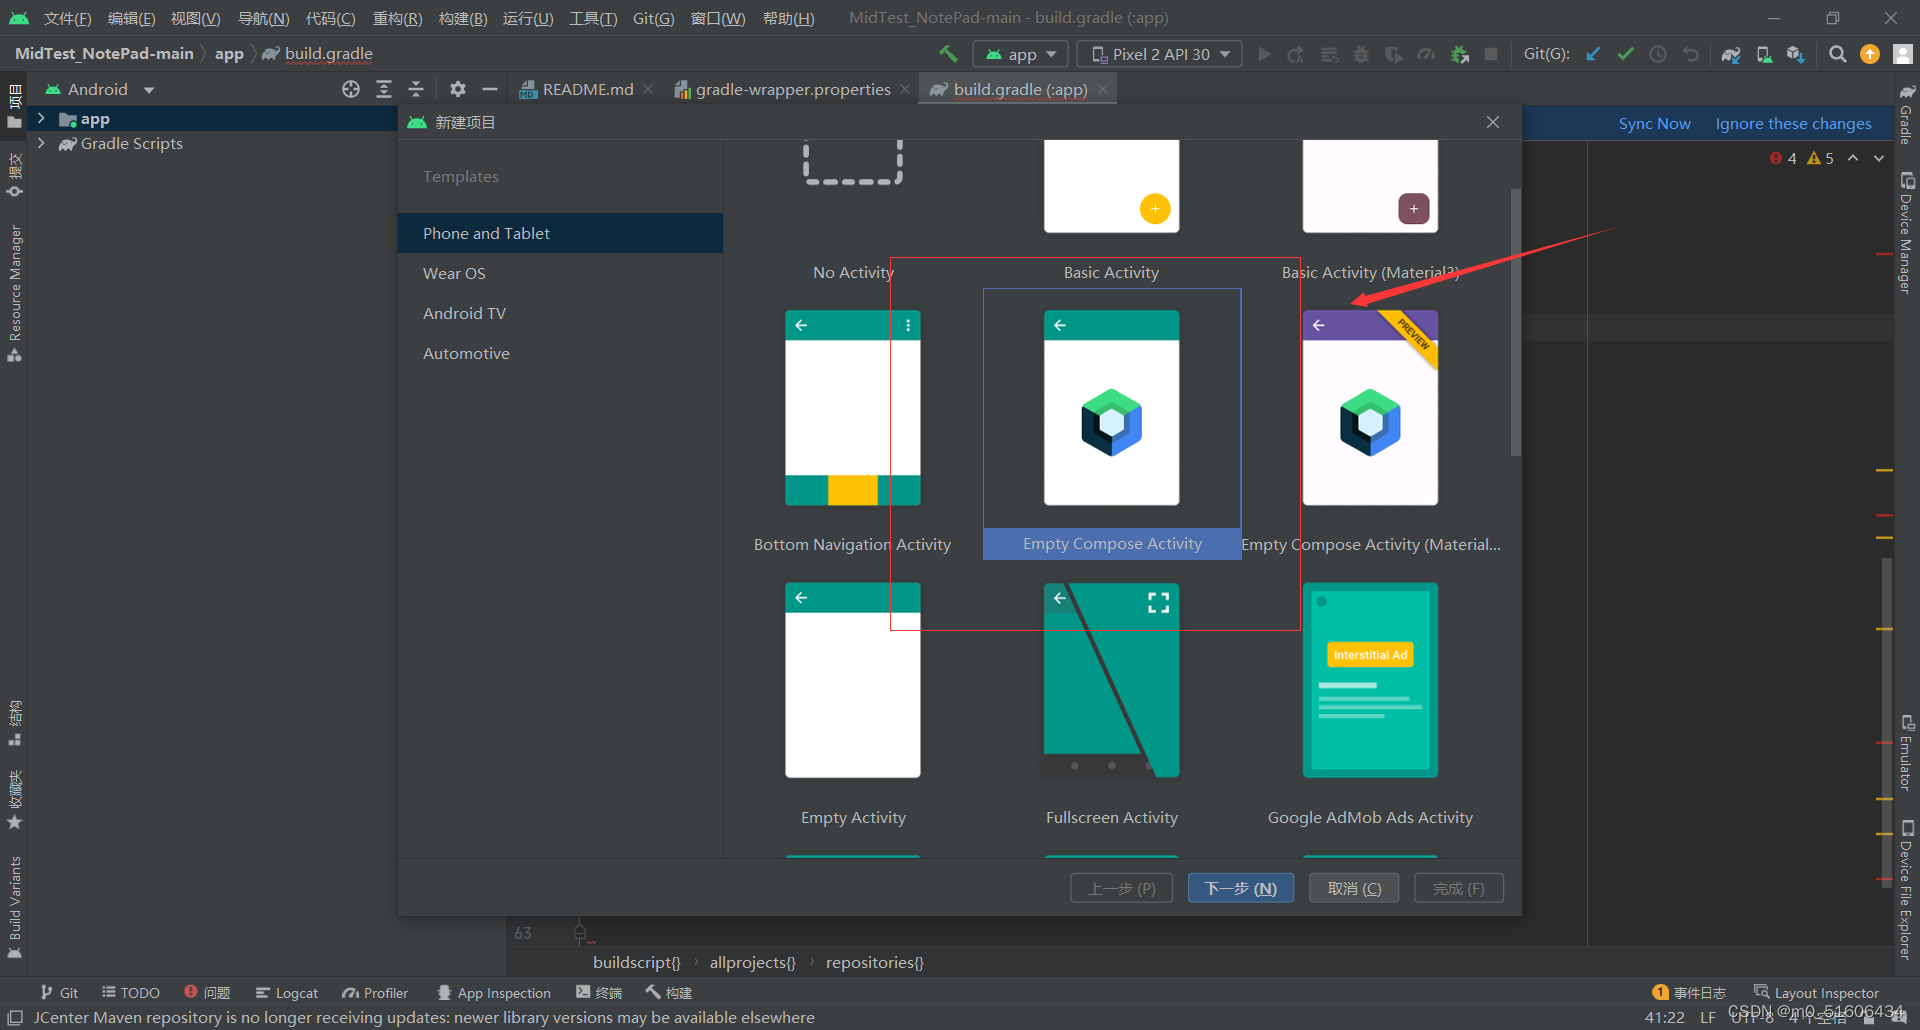
然后继续下去即可
注意:语言是只有Kotlin,因为Jetpack Compose仅支持Kotlin。而且也没有layout,我们大部分的操作都是在.kt里面完成的
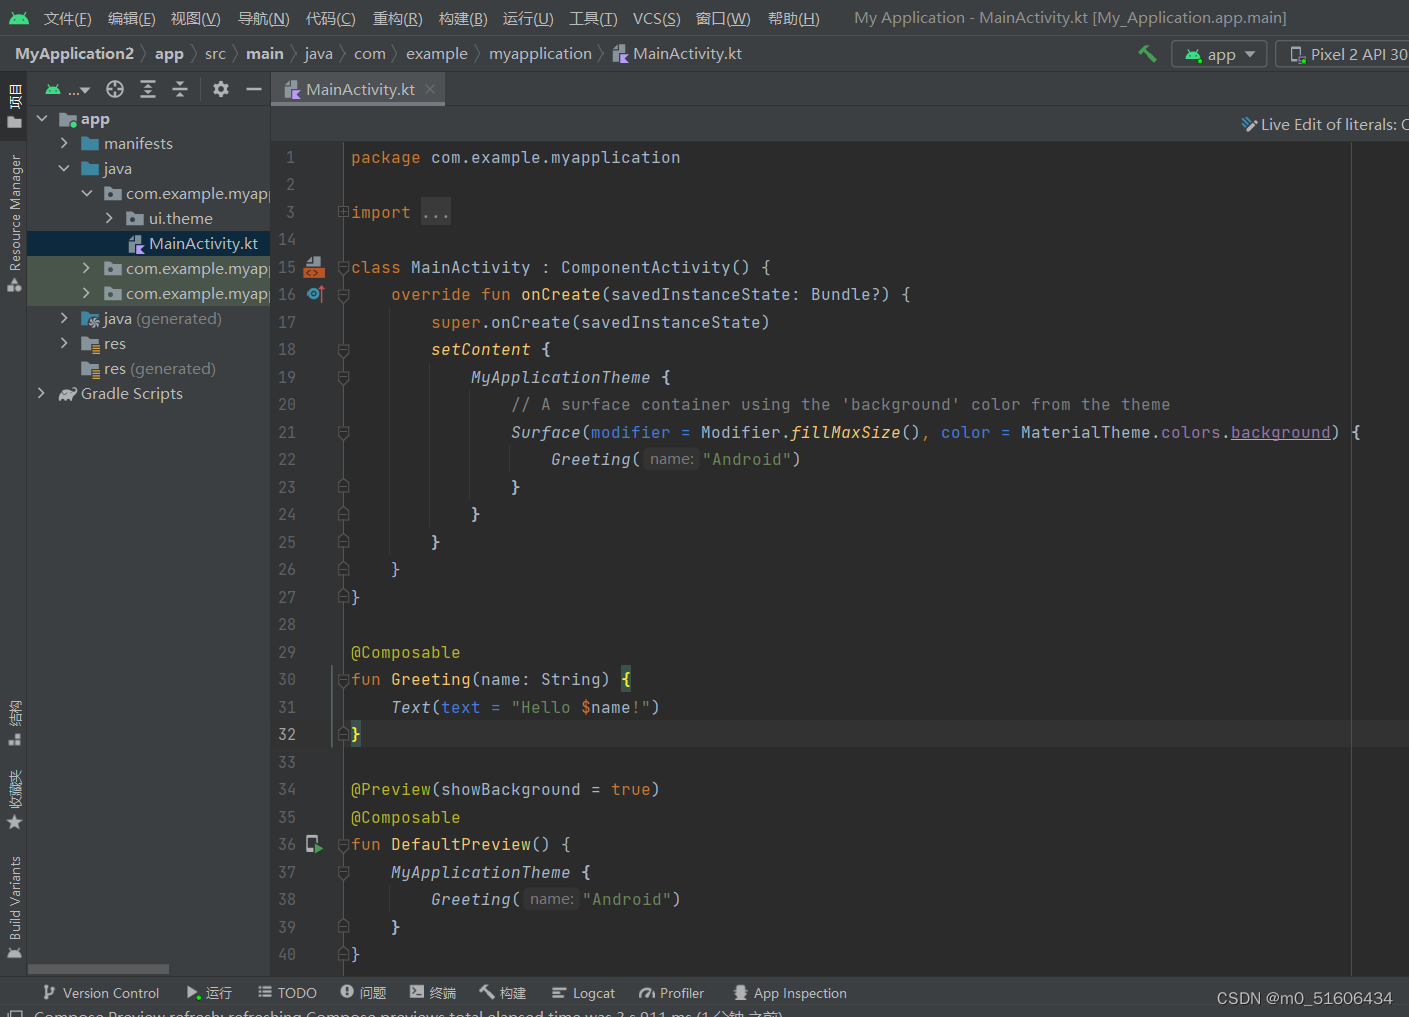
package com.example.myapplicationimport android.os.Bundle
import androidx.activity.ComponentActivity
import androidx.activity.compose.setContent
import androidx.compose.foundation.layout.fillMaxSize
import androidx.compose.material.MaterialTheme
import androidx.compose.material.Surface
import androidx.compose.material.Text
import androidx.compose.runtime.Composable
import androidx.compose.ui.Modifier
import androidx.compose.ui.tooling.preview.Preview
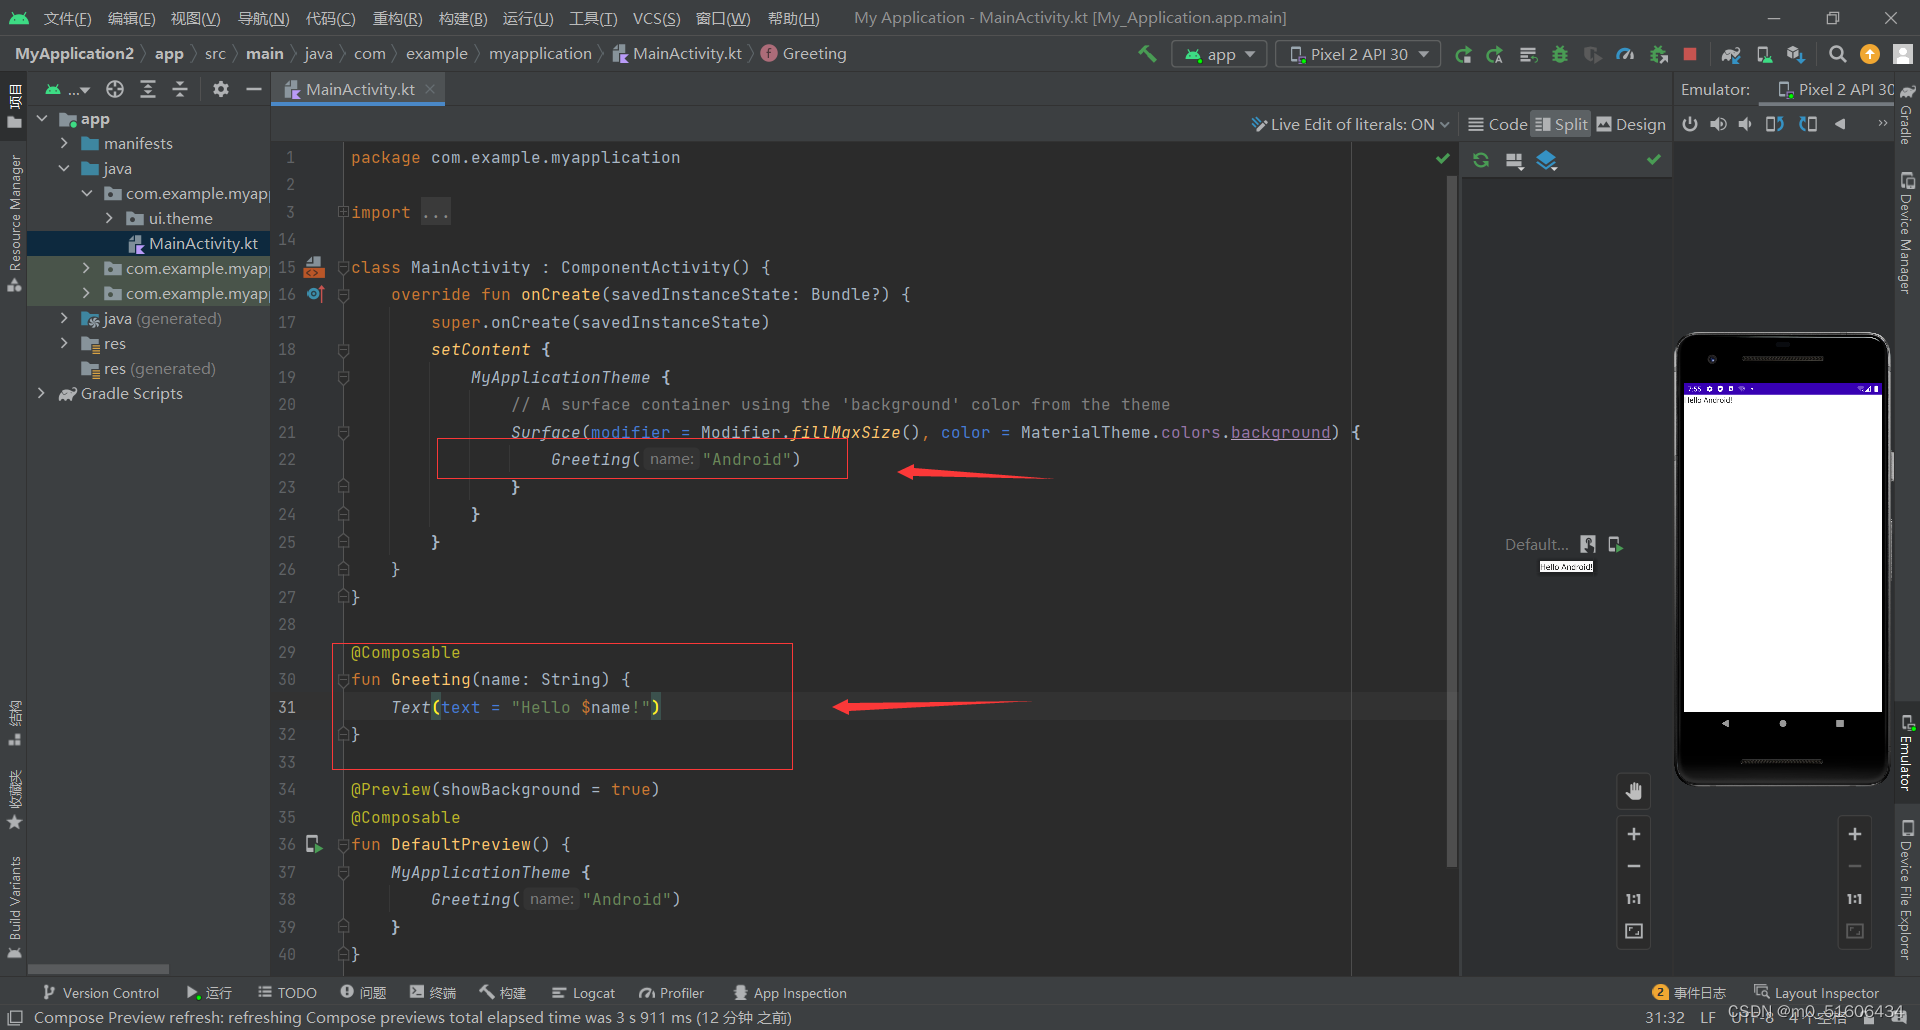
import com.example.myapplication.ui.theme.MyApplicationThemeclass MainActivity : ComponentActivity() {override fun onCreate(savedInstanceState: Bundle?) {super.onCreate(savedInstanceState)setContent {MyApplicationTheme {// A surface container using the 'background' color from the themeSurface(modifier = Modifier.fillMaxSize(), color = MaterialTheme.colors.background) {Greeting("Android")}}}}
}@Composable
fun Greeting(name: String) {Text(text = "Hello $name!")
}@Preview(showBackground = true)
@Composable
fun DefaultPreview() {MyApplicationTheme {Greeting("Android")}
}
一些简单应用
定义可组合函数
  @Composable
fun Greeting(name: String) {Text(text = "Hello $name!")
}
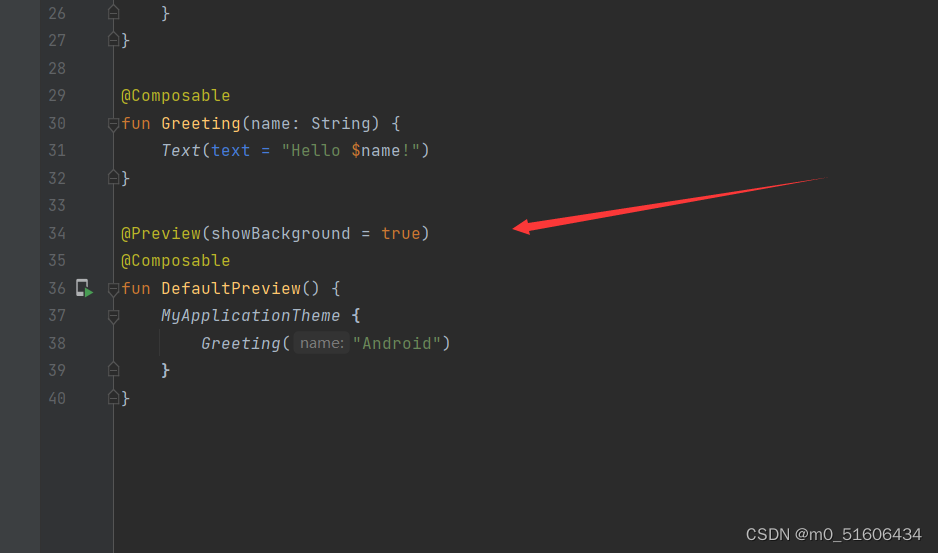
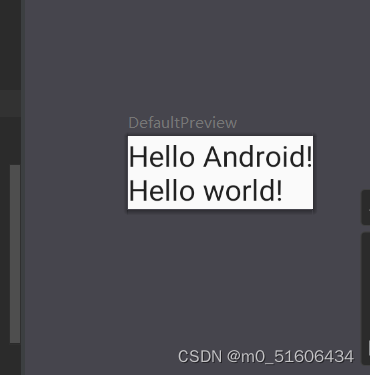
在 Android Studio 中预览函数
借助@Preview注解,可以在 Android Studio 中预览可组合函数
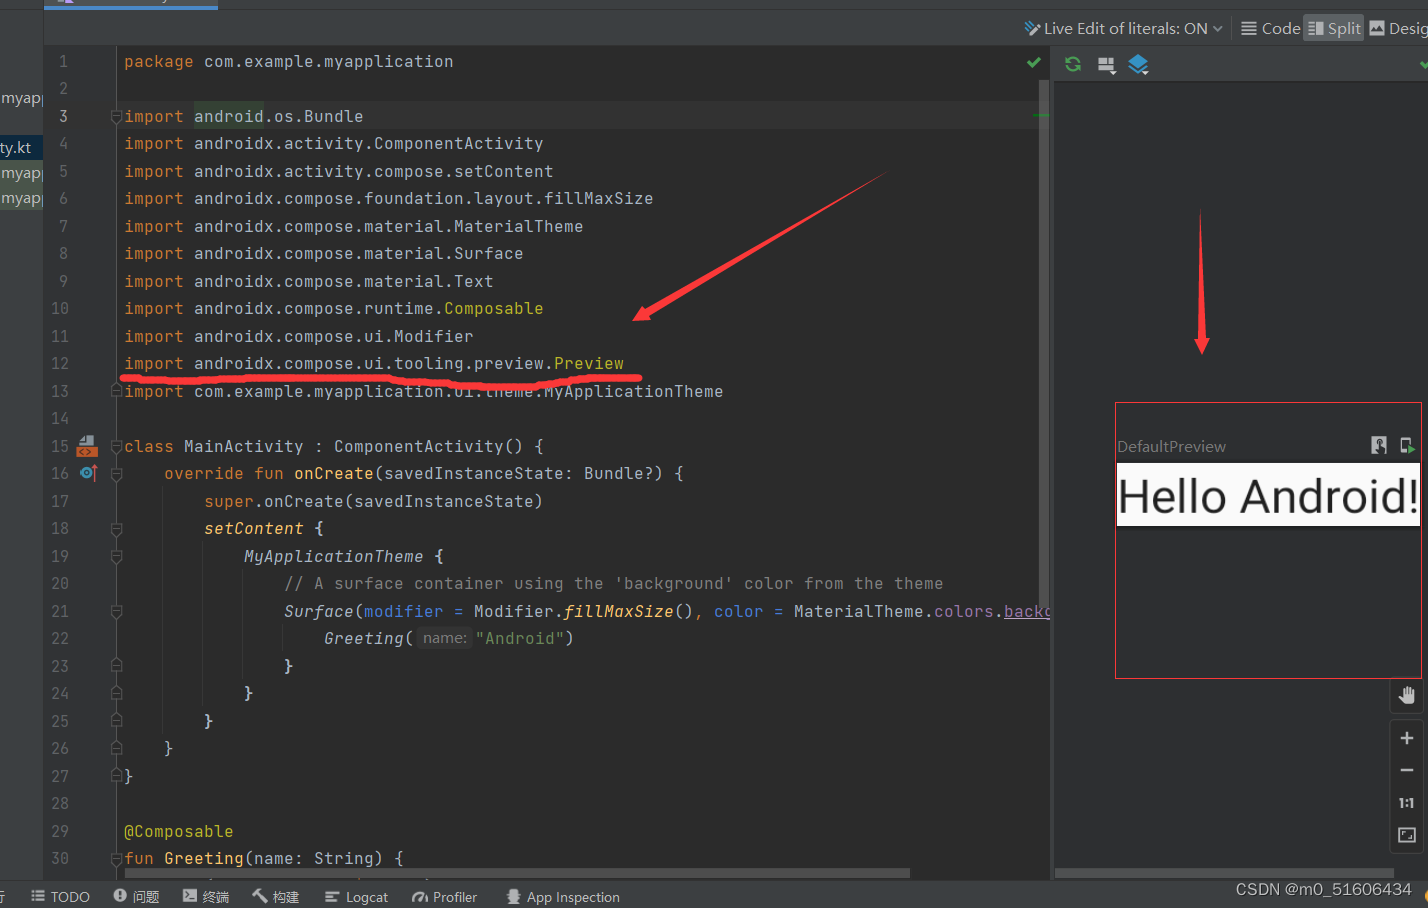
import androidx.compose.ui.tooling.preview.Preview
@Preview(showBackground = true)
@Composable
fun DefaultPreview() {MyApplicationTheme {Greeting("Android")}
}
使用 Column
在MessageCard 函数中添加一个 Column。
这样我们就可以使用 Row 水平排列各项。
import androidx.compose.foundation.layout.Column
@Composable
fun MessageCard(msg: Message) {Column {Text(text = msg.author)Text(text = msg.body)}
}
作者:谢运科
原地址:https://blog.csdn.net/m0_51606434/article/details/128161745
相关内容
热门资讯
汽车油箱结构是什么(汽车油箱结...
本篇文章极速百科给大家谈谈汽车油箱结构是什么,以及汽车油箱结构原理图解对应的知识点,希望对各位有所帮...
美国2年期国债收益率上涨15个...
原标题:美国2年期国债收益率上涨15个基点 美国2年期国债收益率上涨15个基...
嵌入式 ADC使用手册完整版 ...
嵌入式 ADC使用手册完整版 (188977万字)💜&#...
重大消息战皇大厅开挂是真的吗...
您好:战皇大厅这款游戏可以开挂,确实是有挂的,需要了解加客服微信【8435338】很多玩家在这款游戏...
盘点十款牵手跑胡子为什么一直...
您好:牵手跑胡子这款游戏可以开挂,确实是有挂的,需要了解加客服微信【8435338】很多玩家在这款游...
senator香烟多少一盒(s...
今天给各位分享senator香烟多少一盒的知识,其中也会对sevebstars香烟进行解释,如果能碰...
终于懂了新荣耀斗牛真的有挂吗...
您好:新荣耀斗牛这款游戏可以开挂,确实是有挂的,需要了解加客服微信8435338】很多玩家在这款游戏...
SAP PS 第9节 合并采购...
SAP PS 第9节 合并采购申请、组合WBS之影响1 合并采购申请1.1 合并采购申请后台配置1....
盘点十款明星麻将到底有没有挂...
您好:明星麻将这款游戏可以开挂,确实是有挂的,需要了解加客服微信【5848499】很多玩家在这款游戏...
总结文章“新道游棋牌有透视挂吗...
您好:新道游棋牌这款游戏可以开挂,确实是有挂的,需要了解加客服微信【7682267】很多玩家在这款游...