jeecgboot-前端组件封装代码示例
创始人
2024-03-13 15:45:16
0次
首先我们要知道 jeecgboot他前台的组件代码封装文件夹的位置在src-components中,这时我们其实可以观察他们代码的写法(个人感觉学习代码的最好的途径就是临摹他人高质量的代码、多看、多写)路径如图:

接下来我们会在标注3下实现一个简单的自定义组件
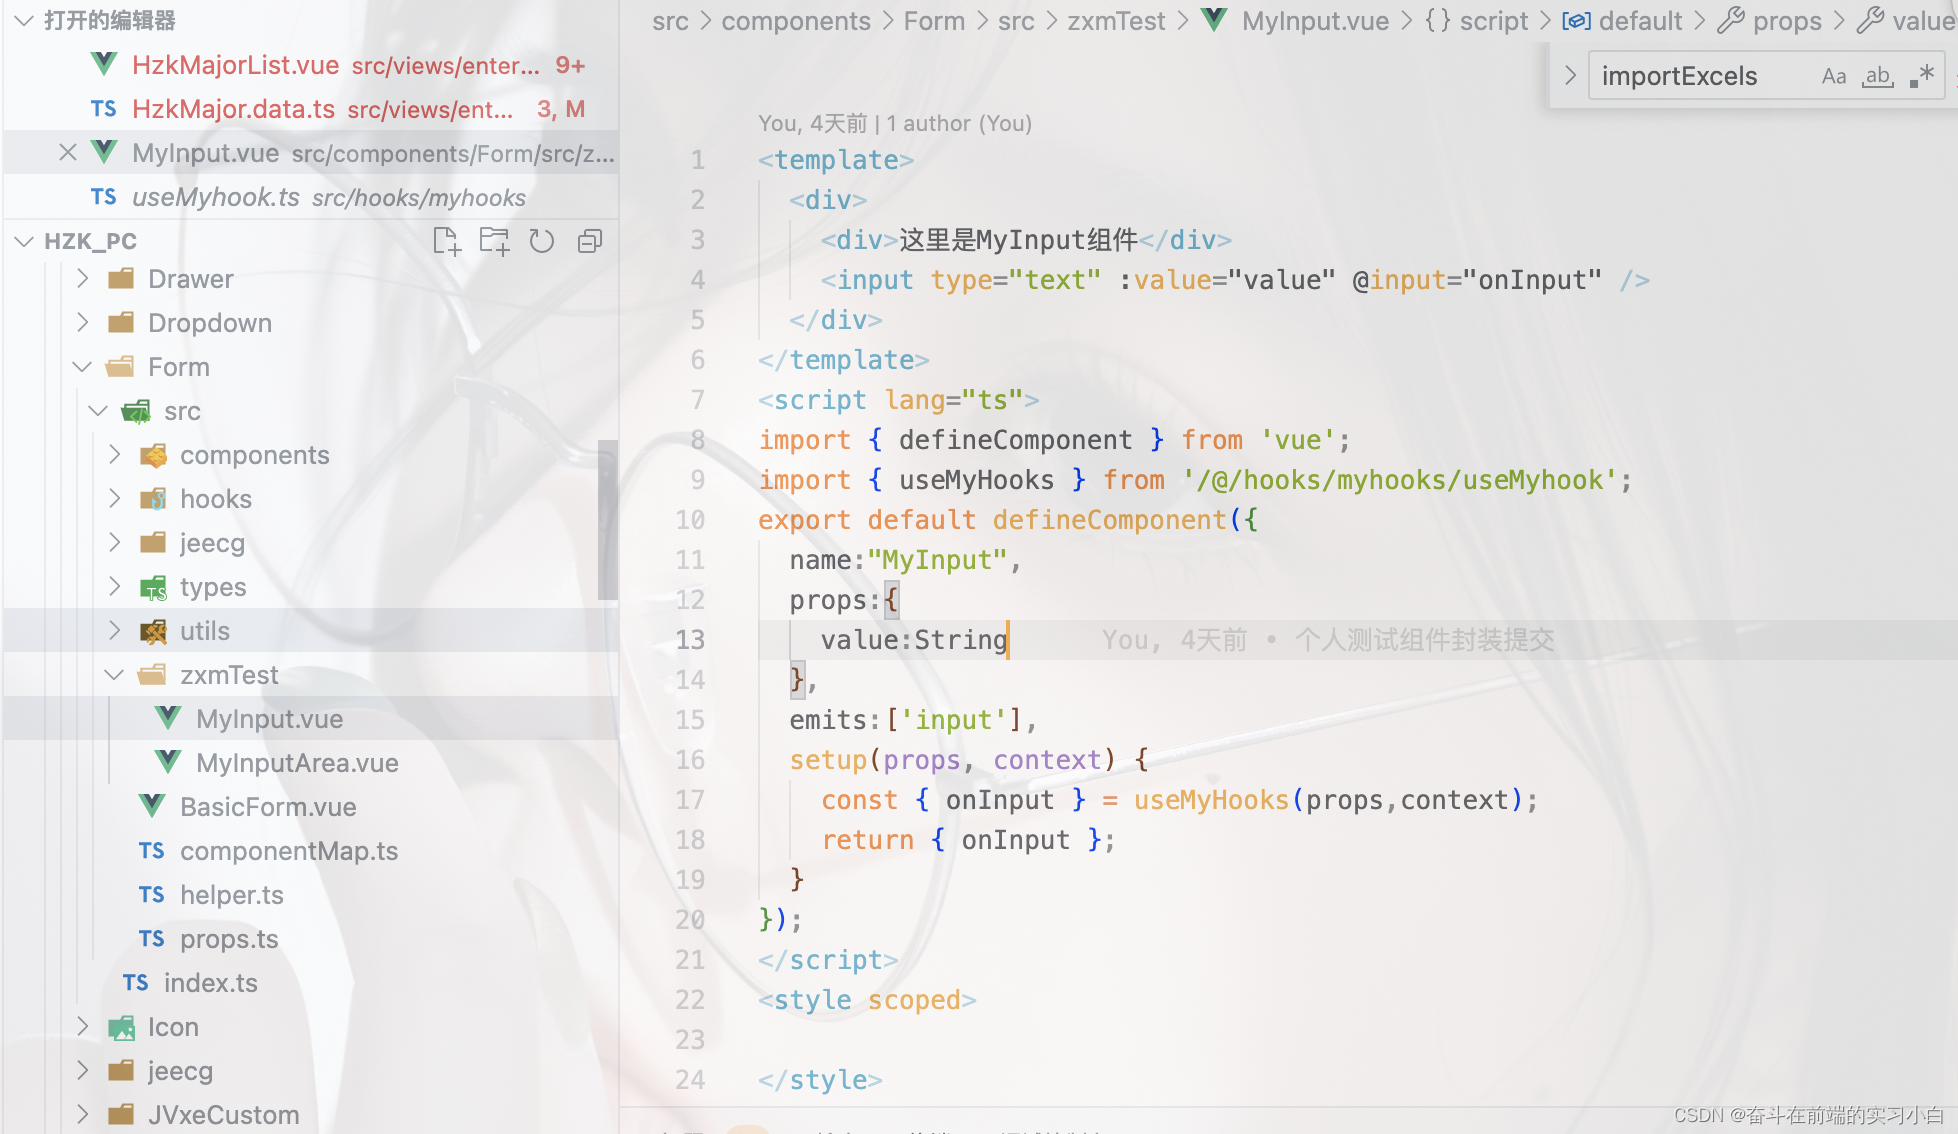
代码在这里哦
这里是MyInput组件
接下来我们回到hook这个封装方法中代码如下:
import { ref,computed } from 'vue';
export function useMyHooks(_props,context){const { emit } = context;const defaultValue = ref('hello word');const innerValue = computed(()=>{if(!_props.value){return defaultValue.value;}else{return  '|' + _props.value + '|';}});function onInput(e){emit('input',e.target.value);}return { onInput , defaultValue,innerValue};
}
最后:撸完代码我们要记得按照他的规则注册下在componentMap.ts中
import MyInput from './zxmTest/MyInput.vue';
componentMap.set('MyInput',MyInput);
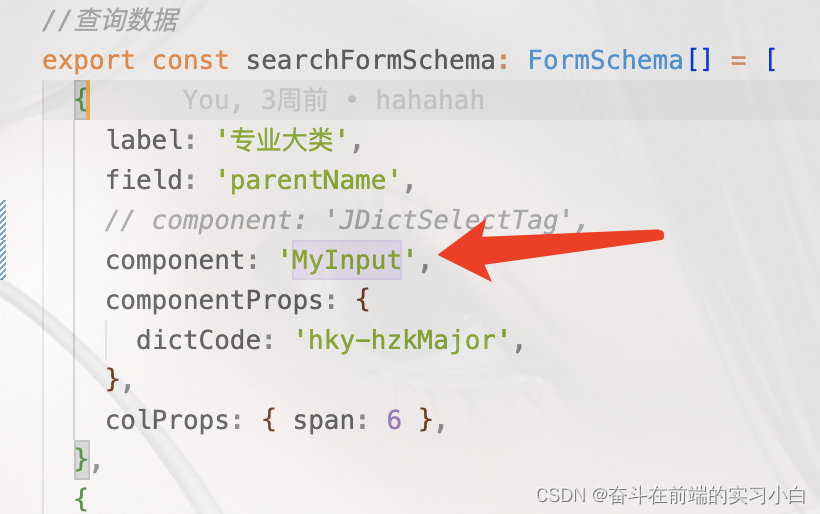
见证奇迹:接下来我们在需要的界面中引入我们写好的组件展示如下:
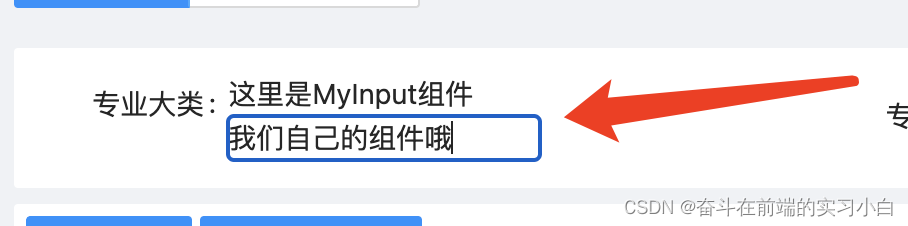
也是作为一个个人的学习记录了希望能帮助路过的各位~
相关内容
热门资讯
美国2年期国债收益率上涨15个...
原标题:美国2年期国债收益率上涨15个基点 美国2年期国债收益率上涨15个基...
汽车油箱结构是什么(汽车油箱结...
本篇文章极速百科给大家谈谈汽车油箱结构是什么,以及汽车油箱结构原理图解对应的知识点,希望对各位有所帮...
嵌入式 ADC使用手册完整版 ...
嵌入式 ADC使用手册完整版 (188977万字)💜&#...
重大消息战皇大厅开挂是真的吗...
您好:战皇大厅这款游戏可以开挂,确实是有挂的,需要了解加客服微信【8435338】很多玩家在这款游戏...
盘点十款牵手跑胡子为什么一直...
您好:牵手跑胡子这款游戏可以开挂,确实是有挂的,需要了解加客服微信【8435338】很多玩家在这款游...
senator香烟多少一盒(s...
今天给各位分享senator香烟多少一盒的知识,其中也会对sevebstars香烟进行解释,如果能碰...
终于懂了新荣耀斗牛真的有挂吗...
您好:新荣耀斗牛这款游戏可以开挂,确实是有挂的,需要了解加客服微信8435338】很多玩家在这款游戏...
盘点十款明星麻将到底有没有挂...
您好:明星麻将这款游戏可以开挂,确实是有挂的,需要了解加客服微信【5848499】很多玩家在这款游戏...
总结文章“新道游棋牌有透视挂吗...
您好:新道游棋牌这款游戏可以开挂,确实是有挂的,需要了解加客服微信【7682267】很多玩家在这款游...
终于懂了手机麻将到底有没有挂...
您好:手机麻将这款游戏可以开挂,确实是有挂的,需要了解加客服微信【8435338】很多玩家在这款游戏...